Save, Approve, and Publish your Content
The following guide has been created to help our users understand the process of Saving, Approving, and Publishing content in T4. The expandable headings are designed for users of all levels to easily reference the steps as required.
Should you have any questions, please contact the Web Content Services Team.
Within T4, there are 2 options to edit content. "Direct Edit" and "Standard Interface" (commonly referred to as Site Structure). While direct edit can be more convenient for quick edits, we strongly recommend the use of Standard Interface.
You can always access T4/Standard Interface by visiting: https://www.t4.mun.ca

Once you've successfully logged into T4, you can access the Site Structure view by clicking the Site Structure Icon at the top-right of your web browser.
![]()
The Site Structure will look similar to the example below:
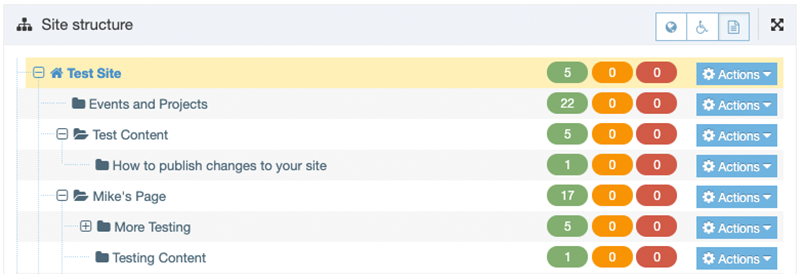
To edit content within a section, navigate to the Actions button that corresponds to the section you wish to edit.
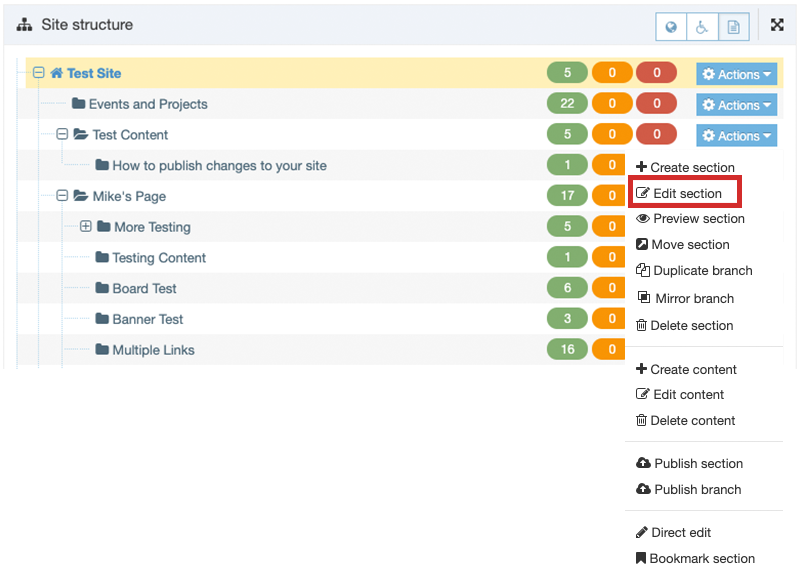
When you click the Actions button, a menu will appear. Click "Edit Section".
From there, you will select the "Content" Tab:
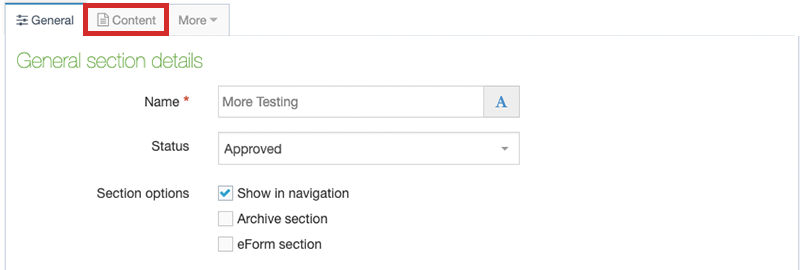
Once you've entered the section you want to edit, select the "Content" Tab:
Once the content tab loads, you will see a list of items contained in the section you are editing:
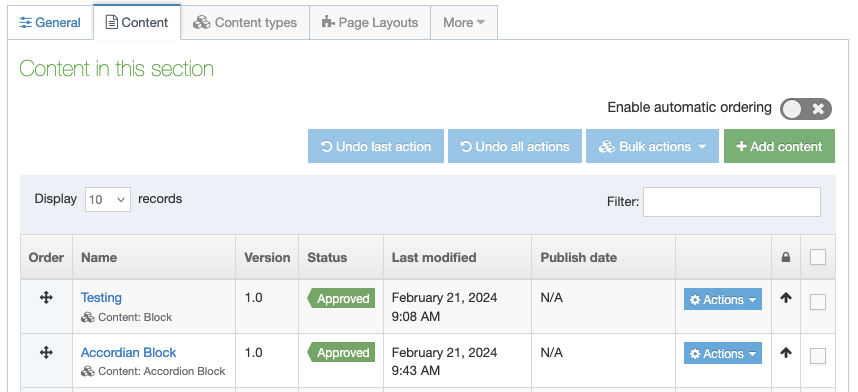
In this example, we are editing a "Content Block" (which is our most popular content type), these steps can be applied to all content types.
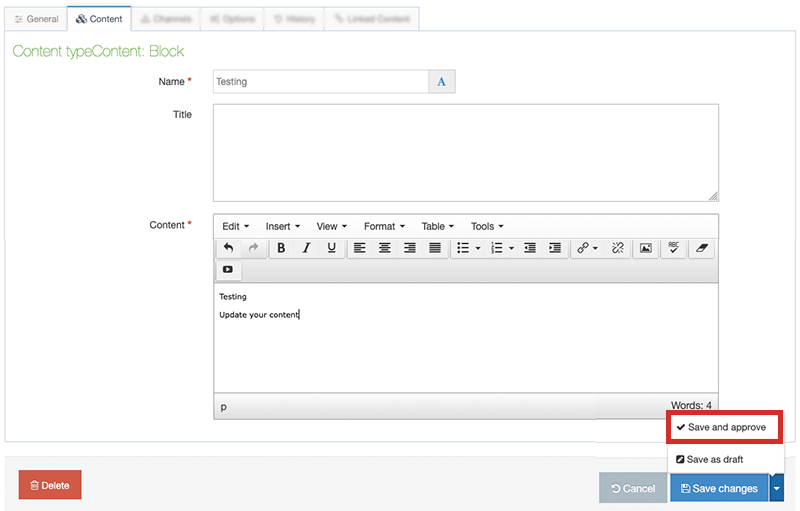
Proceed to edit your content:
![]()
Once you have completed editing your content, navigate to the Arrow next to the blue "Save Changes" button:
![]()
Now, click "Save and Approve":
T4 will now take you back to the list of content within the section you are editing. Click the blue "Save Changes" button at the bottom right:
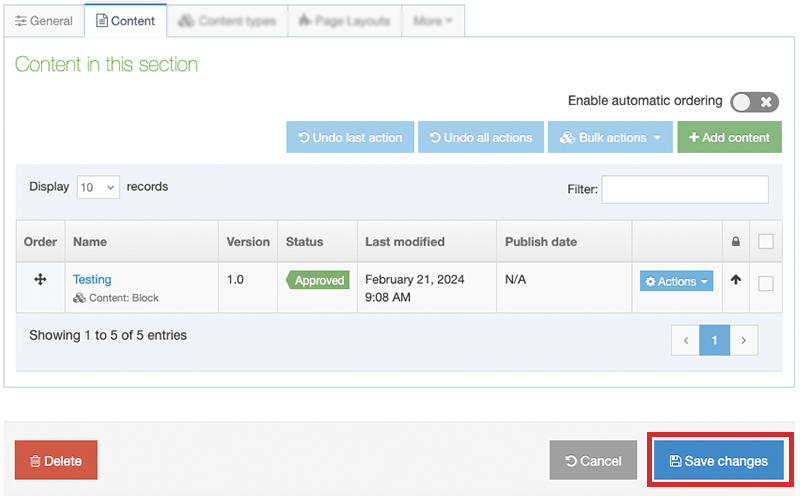
Now that your content has been Saved, and Approved, we must Publish. You can see these options in the Actions menu:

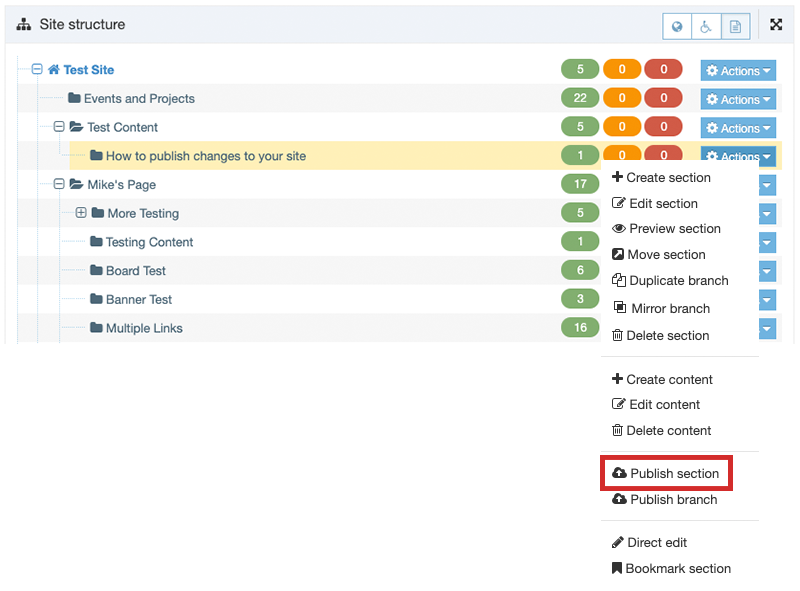
There are 2 options for publishing content, "Publish Section" and "Publish Branch", both will publish your content, we must select the correct option.
If you have made a simple edit to a section (that does not affect a menu item, news article, event listing, etc), click the actions menu on that section, and select "Publish Section":
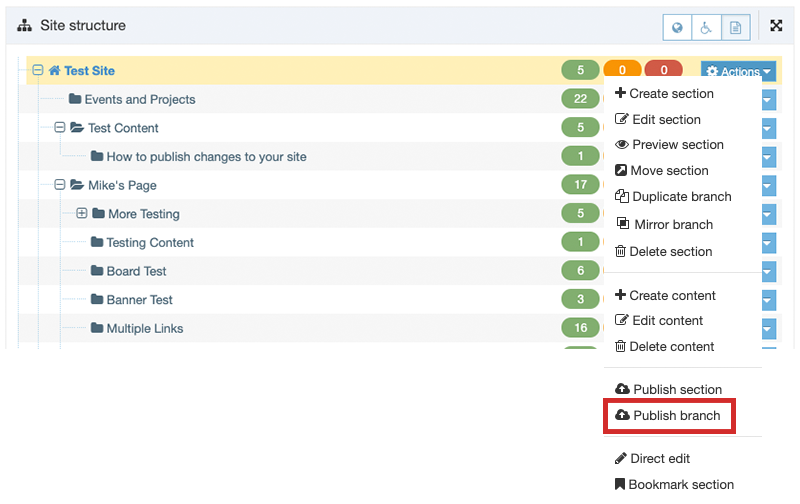
If you have made an edit to a section (that does affect a menu item, news article, event listing, etc), click the actions menu for the entire branch (the blue text atop the structure), and select "Publish Branch":
Congratulations! you have now successfully scheduled your content to be published. This should only take a few minutes.
Extras
While in T4, navigate to the top of the website and click on the small dot/circle to the left of the Site Structure icon:
Note: The dot will appear dark grey normally. It will turn green in colour when it is actively publishing content.

When you click on the dot, you will see the notification window:
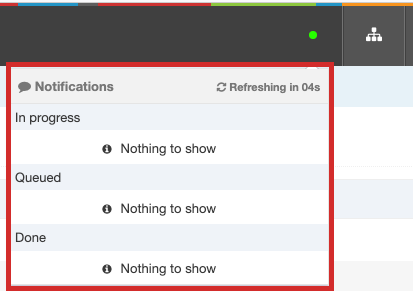
Here, you will see your Publish request first listed under "Queued", then after a few seconds (up to a minute or so) the job will move to "In Progress". Once complete, it will move to "Done". The entire process should take only a few minutes, but could take a short time longer during peak times.
Don't panic. If you've followed this guide correctly, your update is likely published and visible to users.
Explanation
When you visit a website, your browser saves some of the files (like images and the website code) so that the site loads faster the next time you visit. This is called caching. Sometimes, when we update a website, your browser still shows the old version because it's loading those saved files from the cache instead of getting the new ones from the website.
Solution
Hard Refresh: A hard refresh tells your browser to ignore the cached files and load the most recent version of the site.
Quick Guide: How to do a Hard Refresh
| Browser | Windows /PC | Apple / Mac |
|---|---|---|
| Chrome | Hold Ctrl + Shift + press R or hold Shift and click the Reload ⟳ button |
Hold Command (⌘) + Shift + R |
| Firefox | Hold Ctrl + Shift + R | Hold Command (⌘) + Shift + R |
| Edge | Hold Ctrl + Shift + R | Hold Command (⌘) + Shift + R |
| Opera | Hold Ctrl + Shift + R | Hold Command (⌘) + Shift + R |
| Safari | - | Press Command (⌘) + Option + R |