Microsoft Teams: Chat
Notes
- For users who used Skype for Business, similar functionality is highlighted in italics.
- This guidance assumes you have the Teams desktop app installed, you configured your @mun.ca Microsoft 365 account and enabled multi-factor authentication.
- The content is borrowed heavily from guidance developed by Thomas Hawkins, Associate Registrar (Systems). Thank you, Thomas!
Introduction
The Teams desktop client and web application have chat built in. The option can be found under Chat in the side bar.
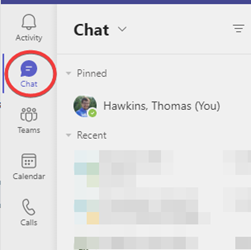
Clicking on Chat will open any Pinned chats followed by your most Recent chats.
Clicking on a person in the list will open your chat history in the right pane. In the right pane, you can scroll back through the chat up to 29 days in the past. In Skype for Business, the chat history disappears when you close the window.
By default, the chat window is integrated into the Teams interface, however, it is possible to pop open a new window for your chat with an individual or group if you want to give it more focus.
Starting a New Chat
To start a new chat, click on the New Chat icon.
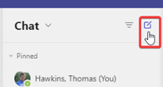
This will open a To: field to the right of the chat list where you can start typing the name or login ID of a person to initiate a chat. By default, you can chat with anyone on the SJ campus who has access to Teams using their @mun.ca account.
Managing Your Status
Teams has a more robust status management feature compared to Skype for Business. You can activate the options by clicking on your photo, or initials in the top bar.
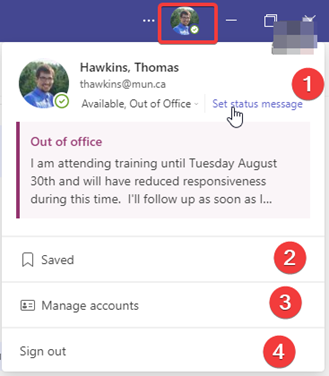
- You can use this link to set a status message. If you have an out of office message set, it will automatically use that as your status message.
- If you have used the “Save Message Feature” this option will show you all the chat messages that have been saved.
- This is a short cut to the Settings -> Account page where you can manage your account.
- This will sign you out of Teams.
If you click on the Set status message link, you will see the following window which provides many options for configuring your status.

- You can enter your status message here. It can be up to 280 characters.
- This checkbox forces your status message to appear when someone tries to message use or mention you in a Teams tool.
- You can automatically clear the status message after a while. This can be useful for setting your message for the morning while you are focusing on a particular task, and then changing it back to available at a certain point in time.
- Clicking Schedule out of office will open the Out of Office settings. This is synchronized with your Outlook calendar and will show your out of office settings and messages. You can enable the option for Send replies only during a time period to schedule a message for a short period of time. This status message will appear in Teams, but also be sent to anyone who emails you. Only use this option if you wish folks emailing you to also receive this message.
The Chat Window
Below is the chat screen, and we will review each of the highlighted features.
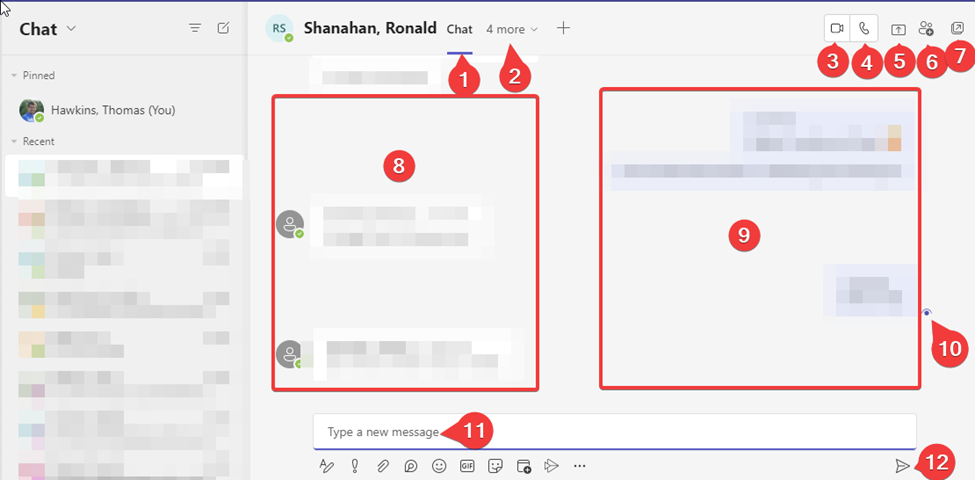
- This is the Chat tab and is automatically highlighted.
- There are other options for interaction with users of Teams, but we will review these separately.
- Like Skype for Business, Teams can conduct impromptu video calls. This button launches a video call.
- Like Skype for Business, Teams can conduct impromptu audio only calls. This button launches an audio call.
- Like Skype for Business, Teams can share a screen to a user. This button launches a screen sharing session. Optionally, audio and video can be added once the session has started.
- Users who are in a screen sharing session can request control of the screen, or as the sharing initiator, you can give control to another individual.
- Like Skype for Business, Teams can create a multi-user group chat. Clicking this button will open a search box where you can add users to the chat. Unlike Skype for Business, this feature works well across multiple devices, and supports enhanced file sharing. You can also rename a group chat, to make it more easily stand out in your chat list.
- This button pops out this chat into its own window. This will allow you to have more focus on this chat and move it around independent of the whole Teams interface. This is useful if you are collaborating on a file or otherwise need more screen space to work.
- Messages from other users will appear on the left side of the screen and will have a white background.
- You can react to others’ messages by hovering over the message and picking a reaction icon. You can also click the … menu to bring up more chatting options.
- Your messages will appear on the right side and will have a blue background.
- This icon will show you if the message was successfully sent, and / or seen by everyone in the chat.
- This is where you type your message to others.
- This button will send a message, or you can press Enter.