Q: How do I log on to the server from my Microsoft Windows PC/Laptop?
A: There are three methods which you can use to access the OSC servers INTERNALLY:
- Domain Login Process (most restrictive eg. used for shared lab PCs)
- UNC path or general OSC server share query (easiest eg. laptops, office PCs)
- Manual network drive mapping (most direct eg. faculty/staff office PCs)
The "UNC path or general OSC server share query" is the easiest and most widely used method of access on the campus network from a generic windows PC. All will be discussed in detail below.
Option 1: Domain Login Process:The OSC domain is called "OSCNET". Only OSCit staff can add or remove PCs on the OSC domain. Logging into a PC which is part of the OSCNET domain is the simplest method of logging on to the OSC services but this method of access has the disadvantage of forcing strict control over your PC. Therefore, it will not be possible to add or remove software or control functions on your PC which normally require Windows power user or administrator control. Some science software is built by the vendor to only operate properly if run as administrator. In cases such as these, it is not recommended to use this logon method. You should use the "Generic Windows Login" for such uses. Most PCs which use a domain login are heavily shared PCs, where the systems primary tasks are generic PC uses as opposed to specific scientific instrumentation control or scientifc software operation. The advantage of this login method is that the mapping of your basic network access share drives is performed automatically for you by the server. Remember to log off after using your account.
Step by step instruction on logging on in domain mode with screen captures is provided below:
|
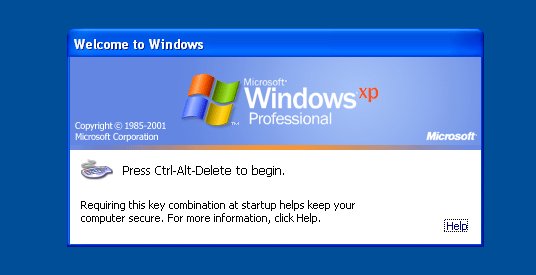
| Step1. When prompted by the screen press the keys "CTRL ALT DEL" simultaneously.
|
 |
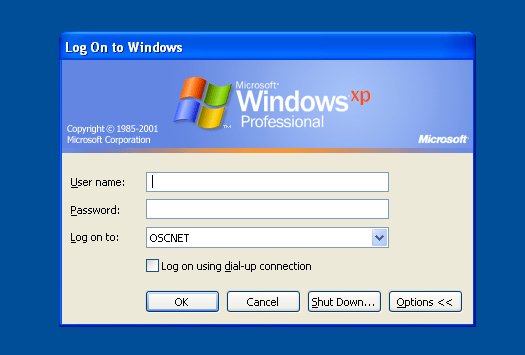
| Step 2. Login when prompted ensuring that the field labelled "Log On To" is set to read "OSCNET"
|
 |
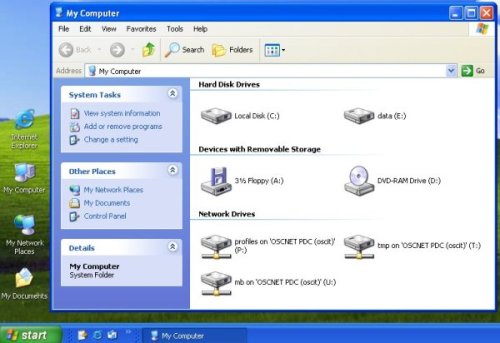
| Step 3. Upon clicking "OK" the server will initialize your session. This may take some time especially if this is the first time logging on. In some cases a notepad window will appear on login. This is inconsequential and you may safely close this system window immediately. Once your desktop appears you can double click on the "My Computer" icon. On the lower half of the My Computer window, you should see three network drives. You can safely ignore the drive labelled as "P:". This is a system profile drive.
The drive labelled "U:" is your personal home server account storage drive which is NOT shared with anyone. The drive labelled "T:" is a shared data scratch space for ALL users. This is NOT a private space and NOT a permanent data repository as all data is deleted each Saturday. This space is useful if you wish to make shared public items available to other users. On the T: drive, the owner of a file/folder has deletion rights, other users can only copy/view the item. Other share drives, such as lab share drives can also be accessed, however these drives must be added manually. How to perform this operation is discussed under the topic: Generic Windows Login which is discussed next. |
Option 2: Generic Windows LoginIn many instances it is not desirable to use a PC in domain login mode. Good examples of this are laptops and PCs with specific single uses such as the operation of scientific diagnostic equipment. MAny of these systems should be operated in local administrator mode. However, such a login is mitigated solely by the local PC. Once logged on to the local PC desktop, it may be desirable to connect to the network storage. To this end the OSC servers can be addressed to do so manually. There are two manual methods of adressing the main OSC network server systems: UNC path or general OSC server share query and direct manual mapping of a network drive. => UNC path or general OSC server share query This method allows a user to direct a local PC to query the main OSC servers to display all available network shares. Upon successful validation by the user, the shares which the user has access to will be displayed as share folders which can be opened and the contents accessed. Folder share names which are displayed but which contents cannot be accessed are items to which a user's login has no authority. This decision is based on login name and account criteria and is dictated by the server login processes. This method of access can be performed by ANY windows PC within the scope of the MUN campus network system.
|
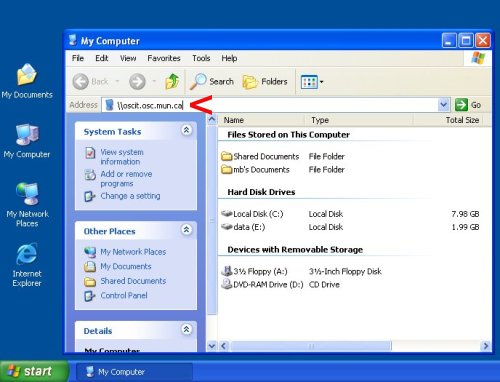
| Step1. Double click on the "My Computer" icon. In the address field type the machine name "oscit.osc.mun.ca" (this is the main service name which provides the OSCNET network server services). Once entered, hit the "enter" key. |
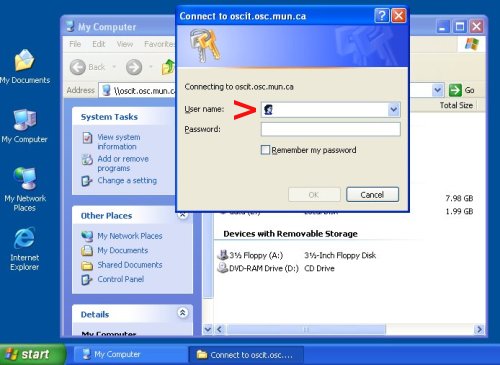
| Step 2. After a short delay, a login prompt will appear. Enter your OSC login name and password. If you are sharing the PC with others, do NOt check the "save password" option or others will have access to your account. |
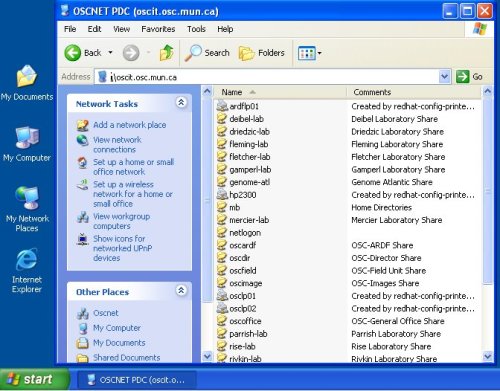
| Step 3. A windows displaying all available share folders on the OSC system should appear. The folder bearing your login name is synonymous with the U: drive mapping of a domain login (see above section). The "tmp" folder name is synonymous with the T: drive mapping of a domain login (see above section).
|
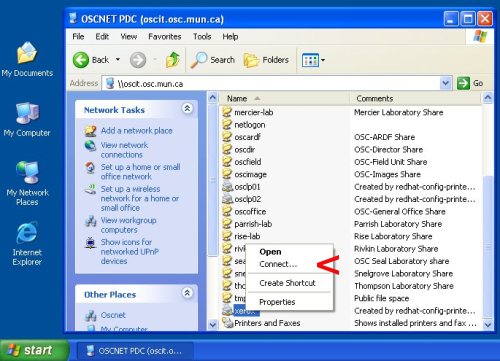
| Step 4. Should you also wish to connect to the main xerox network printing service, you can right click on the printer item in the oscit folder display named "xerox". Once the context connect menu appears, left click on the "connect" item therein. The correct printer settings will be automatically installed. Note: you must be a local windows PC administrator to do this, other wise an error will appear. |
Option 3: Direct manual mapping of a network driveThis method is based on the same requirement assumptions as in the UNC method but allows repeated access to server data during a windows session to by addressing an assigned drive letter to a server resource. |
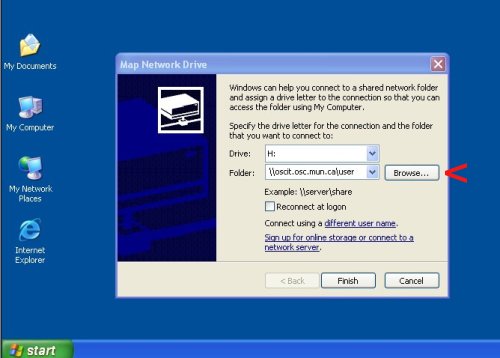
| Step 1. Once logged on to the local windows PC, right click on the "My Computer" desktop icon and click on the item called "Map Network Drive". A new window will appear. In the "Drive" field choose any available letter from the drop down menu. In the "Folder" field type oscit.osc.mun.causername where "username" is your OSC server login name. Click on "Finish". |
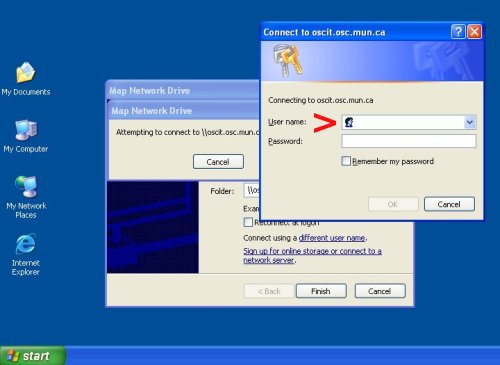
| Step 2. Once the authentication window appears, enter your login name and password. Ensure you do not check "remember password" box. |
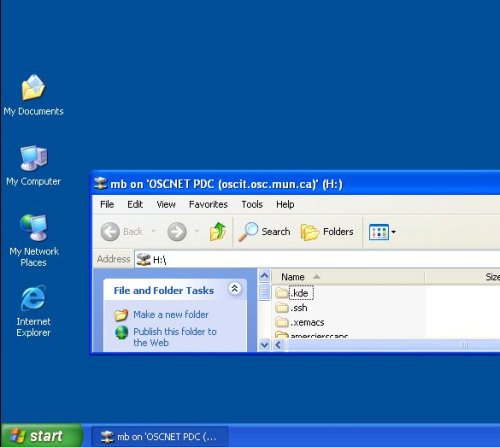
| Step 3. A new window will appear, displaying the contents of your account. |
| Step 4. If you close this window and should you wish to return to the same location, simply double click on the "My Computer" icon. You will notice that an additional drive is listed under the drive letter you originally selected. Double click to enter this location. |